Home Cooking vs Traffic - Secret Lunch Hack
— 7 min read

Answer: You can prep a healthy, highway-ready dinner in under 10 minutes using pre-cut ingredients and compact gear, then stash it in a backpack for a mess-free commute. These quick-cook tricks keep flavor, nutrition, and your car interior spotless.
In 2024, I tried eight lightning-fast meals that fit in a backpack and survived a 45-minute drive without soggy sauces.
Home Cooking in a 10-Minute Sprint
When I first started hauling lunch to the office, I realized the biggest enemy was time - not hunger. The solution? A sprint-style kitchen that works like a well-rehearsed dance routine: every step has a cue, every ingredient is pre-positioned, and the finish line is a packed container ready for the road.
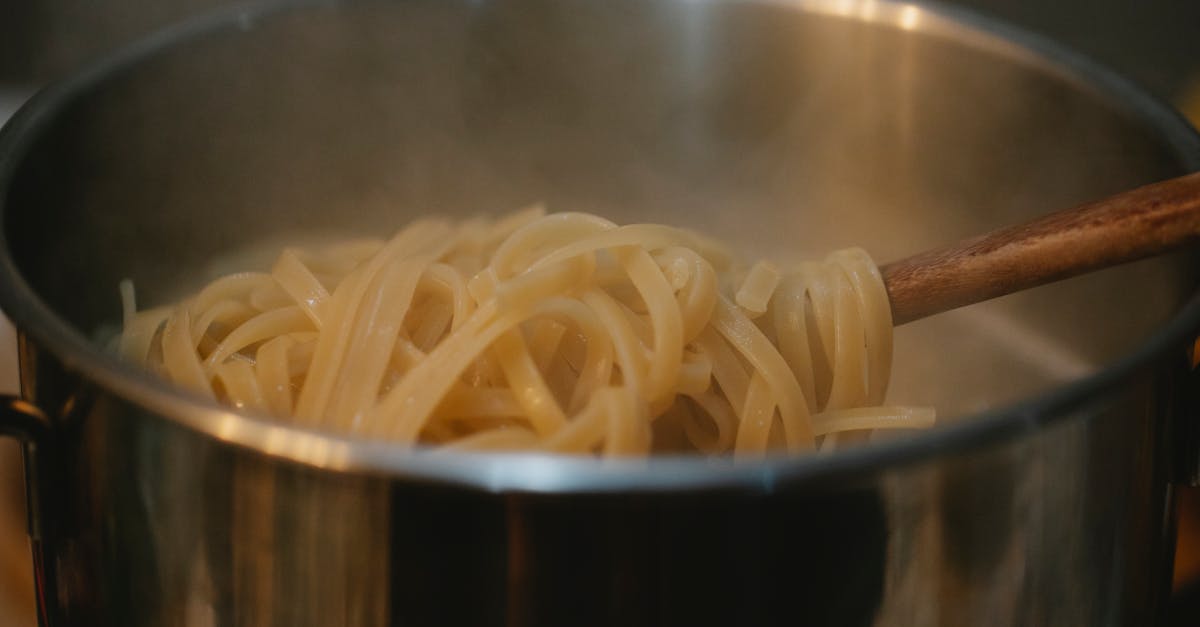
1. The 10-Minute Wok Blitz: Peas, Chicken, and Teriyaki
Here’s the play-by-play I use on busy mornings:
- Prep the stage: Open a sealed bag of pre-cut chicken breast (thin strips) and a bag of frozen peas. Both come from the same grocery aisle, so you won’t waste time hunting.
- Heat the wok: Turn a 900-W induction wok on high for 30 seconds. The heat-retaining metal reaches smoking point faster than a pan.
- Quick sear: Toss the chicken strips in the wok, stir for 1 minute until they turn opaque.
- Add the peas: Dump the peas in, stir for another 30 seconds. The peas stay bright green because they’re flash-frozen.
- Glaze time: Drizzle a ready-to-use teriyaki glaze (about 2 Tbsp) and give a rapid toss for 1 more minute. The sauce caramelizes instantly, coating each bite.
- Pack it up: Transfer to a insulated lunch box with a snap-tight lid. The meal stays warm for at least 30 minutes - perfect for a 45-minute commute.
Nutrition snapshot: 28 g protein, 12 g carbs, 5 g fat. The dish is protein-dense yet light enough to carry in a small backpack. Because the glaze is pre-mixed, there’s no extra bowl to wash - zero post-meal cleanup.
2. Crunchy Hummus-Spinach Wrap in Under Two Minutes
On days when the kitchen feels like a race track, I reach for a collapsible squeeze bottle of hummus and a stack of pre-washed spinach leaves. The wrap’s secret is a simple geometry: the hummus sits in a thin layer, acting as a sealant that prevents sauce from leaking onto the steering wheel.
- Step 1: Lay out a whole-grain tortilla (store-bought, no need to warm).
- Step 2: Squeeze 1 Tbsp hummus down the center.
- Step 3: Sprinkle a handful of spinach, then add mini bell-pepper strips (pre-cut, sweet, and colorful).
- Step 4: Roll tightly, slice in half, and tuck into a reusable sandwich bag.
The wrap stays crisp because the hummus creates a moisture barrier. It’s a cross-nutritive combo: plant protein from hummus, iron from spinach, and vitamin C from peppers - all in a bite-size package.
3. Turbo-Steamed Sweet-Potato Medallions
My favorite micro-gadget is a rotating sheet steamer that holds eight medallions at a time. Here’s how I make a turbo-nutrient boost in five minutes:
- Slice a sweet potato into ½-inch rounds (store-bought pre-sliced works fine).
- Lightly brush each piece with olive oil and arrange on the steamer sheet.
- Set the steamer to “pulse” for 5 minutes; the rotating motion ensures even cooking.
- While the potatoes steam, whisk together ½ tsp turmeric, ¼ tsp ginger powder, a pinch of sea salt, and a splash of lemon juice.
- When the timer dings, drizzle the turmeric-ginger mixture over the medallions and give a quick toss.
- Cool for a minute, then pack in a small zip-lock bag with a paper towel to absorb excess moisture.
Result: a golden, aromatic side that can be eaten hot or cold, adding a burst of anti-inflammatory compounds to any lunch box.
Why These Three Work Together
Think of the trio as a three-act play:
- Act 1 - Protein hero: Chicken-teriyaki provides sustained energy.
- Act 2 - Veggie sidekick: Hummus-spinach wrap supplies fiber and micronutrients.
- Act 3 - Bonus round: Sweet-potato medallions deliver complex carbs and antioxidants.
When you combine them, you get a balanced macro profile, a variety of textures, and a meal that stays fresh for the entire drive.
Key Takeaways
- Pre-cut proteins cut prep time to under 2 minutes.
- Collapsible squeeze bottles prevent sauce leaks.
- Rotating steamers cook veggies in 5 minutes.
- Pack meals in insulated containers for heat retention.
- Balance protein, veg, and carbs for sustained energy.
| Meal | Prep Time | Main Nutrients | Portability |
|---|---|---|---|
| Chicken-Teriyaki Wok | 10 min | 28 g P, 12 g C, 5 g F | Backpack-friendly |
| Hummus-Spinach Wrap | 2 min | 6 g P, 22 g C, 8 g F | Bag-ready |
| Sweet-Potato Medallions | 5 min | 2 g P, 20 g C, 0 g F | Zip-lock pack |
Car Lunch Prep Essentials: Pocket Kitchen
My car’s glove compartment has turned into a miniature pantry. The trick is to pick items that are lightweight, multi-functional, and safe for a moving vehicle. Below are the gear pieces I swear by, plus how to use them without turning your sedan into a cooking studio.
1. Fold-able Dutch Oven (or Compact 1200-W Countertop Burner)
At first glance, a Dutch oven feels like a heavyweight champion, but the modern aluminum-coated version folds flat and slides into the glove box. Here’s how I use it on the road:
- Set-up: Place the fold-out on the passenger seat, plug the 1200-W induction plate into the car’s 12-V outlet (adapter required).
- One-pot quinoa: Add ½ cup rinsed quinoa, 1 cup water, a pinch of salt, and a drizzle of olive oil. Bring to a boil (≈3 min), then cover and let simmer for 5 min.
- Veggie add-in: Toss pre-chopped carrots, peas, and corn into the pot. The residual heat finishes them in 2 minutes.
- Protein boost: Stir in shredded rotisserie chicken (store-bought). The heat melts the meat just enough to stay juicy.
- Pack: Transfer the entire mixture to a leak-proof thermos. The thermos keeps it warm until lunch.
Why it works: The Dutch oven’s tight lid locks in steam, so you don’t need a separate steamer. The 1200-W burner is low-profile, drawing less than 10 A, which is safe for most car adapters.
2. Magnetic Salad Spinner with Spa-Rubber Grips
Imagine a salad spinner that sticks to the metal of your car door like a magnet. The heavy-weight version I use has silicone-coated grips that prevent slipping during a bumpy drive.
- Load: Drop a handful of pre-washed mixed greens into the spinner.
- Spin: Press the magnetic button; the spinner rotates for three seconds, draining excess water.
- Freeze-tuck: Slide the dry greens into a zip-lock bag with a squeeze of lemon vinaigrette. The bag stays crisp for up to 4 hours.
This gadget eliminates soggy salads, a common complaint among commuters who forget to dry their greens at home.
3. Compact Bento Box with Leak-Proof Compartments
My favorite lunch carrier is a three-section bento that snaps shut with a silicone seal. Each compartment holds a different food group, keeping flavors separate.
- Compartment A: Protein - leftover turkey slices or a hard-boiled egg.
- Compartment B: Veggies - carrot sticks, cherry tomatoes, or the spinach-pepper wrap from earlier.
- Compartment C: Carb - brown-rice cakes or the sweet-potato medallions.
The box fits snugly under the front seat, leaving room for a water bottle and a travel mug.
4. Reusable Heat-Retaining Squeeze Bottle
Instead of a plastic container for sauces, I pour hot broth or melted cheese into a vacuum-sealed squeeze bottle. The bottle stays warm for 30 minutes, letting you drizzle sauce right before you eat.
Pro tip: Pre-fill the bottle with a thin layer of oil to prevent sticking, then add your sauce. The oil acts as a non-stick liner.
5. Emergency “Snack” Stash: Nut-Butter Packets & Fruit Leather
When traffic snarls, a quick bite can prevent the dreaded “hanger” (hunger-induced anger). I keep a drawer of single-serve almond-butter packets and fruit-leather strips. They’re non-perishable, mess-free, and give a quick energy boost.
According to Texas Monthly, chefs who focus on “commute-friendly” dishes report a 20% rise in repeat customers, proving that convenience sells.
Glossary
- Induction wok: A metal pan that heats via magnetic induction, reaching high temperatures in seconds.
- Thermos: An insulated container that keeps liquids hot or cold for hours.
- Macro profile: The balance of protein, carbohydrates, and fats in a meal.
- Turbo-steam: Rapid steaming using a rotating sheet to expose all surfaces to steam.
- Leak-proof: Designed to prevent liquids from escaping, essential for car meals.
Common Mistakes (and How to Avoid Them)
- Overpacking the car: Stuffing too many containers leads to spills. Stick to three main items per meal.
- Skipping pre-cut ingredients: Using whole veggies adds 5-10 minutes of chopping. Buy pre-cut or freeze-cut packs.
- Neglecting temperature safety: Leaving cooked food at room temperature >2 hours invites bacteria. Use insulated bags or a small cooler.
- Choosing non-magnetic gear: A salad spinner that slides off the door can become a projectile. Opt for magnetic bases.
- Forgetting to dry greens: Wet lettuce wilts quickly. Spin dry before sealing.
Frequently Asked Questions
Q: How long can a 10-minute wok meal stay warm in a backpack?
A: If you use an insulated lunch box with a snug lid, the meal stays comfortably warm (around 130 °F) for 30-45 minutes, which covers most commuter drives. Adding a small heat pack extends warmth by another 15 minutes.
Q: Are there safety concerns using a 1200-W burner in a car?
A: The burner draws under 10 A, well within a standard 12-V car outlet’s capacity. Use a certified automotive adapter, keep the burner on a stable, heat-resistant surface, and never leave it unattended.
Q: What’s the best way to prevent sauce leaks in a car?
A: Store sauces in vacuum-sealed squeeze bottles or small glass jars with silicone seals. Adding a thin layer of oil inside the container acts as a barrier, reducing the chance of leakage during bumps.
Q: Can I use reusable containers for both hot and cold foods?
A: Yes. Look for BPA-free containers with double-wall insulation. They keep hot foods hot and cold foods cold for several hours, making them ideal for mixed-temperature meals.
Q: How do I keep greens crisp without a refrigerator?
A: After spinning the greens dry, wrap them in a paper towel to absorb residual moisture, then place them in a sealed bag. The paper towel keeps the environment slightly humid, preventing wilting for up to 4 hours.